Quick Start
After installing Cotiza CPQ, follow this guide for a step-by-step walkthrough of the minimum configuration needed to create your first Quote.
Configuration checklist
| Step | Section |
|---|---|
| Assign Cotiza CPQ Admin permission set | Step 1 |
| Create System Settings record | Step 2 |
| Configure products and price books | Step 3 |
| Create your first Playbook | Step 4 |
| Create a test Quote | Step 5 |
| Copy configuration between orgs (optional) | Sandbox Seed Data |
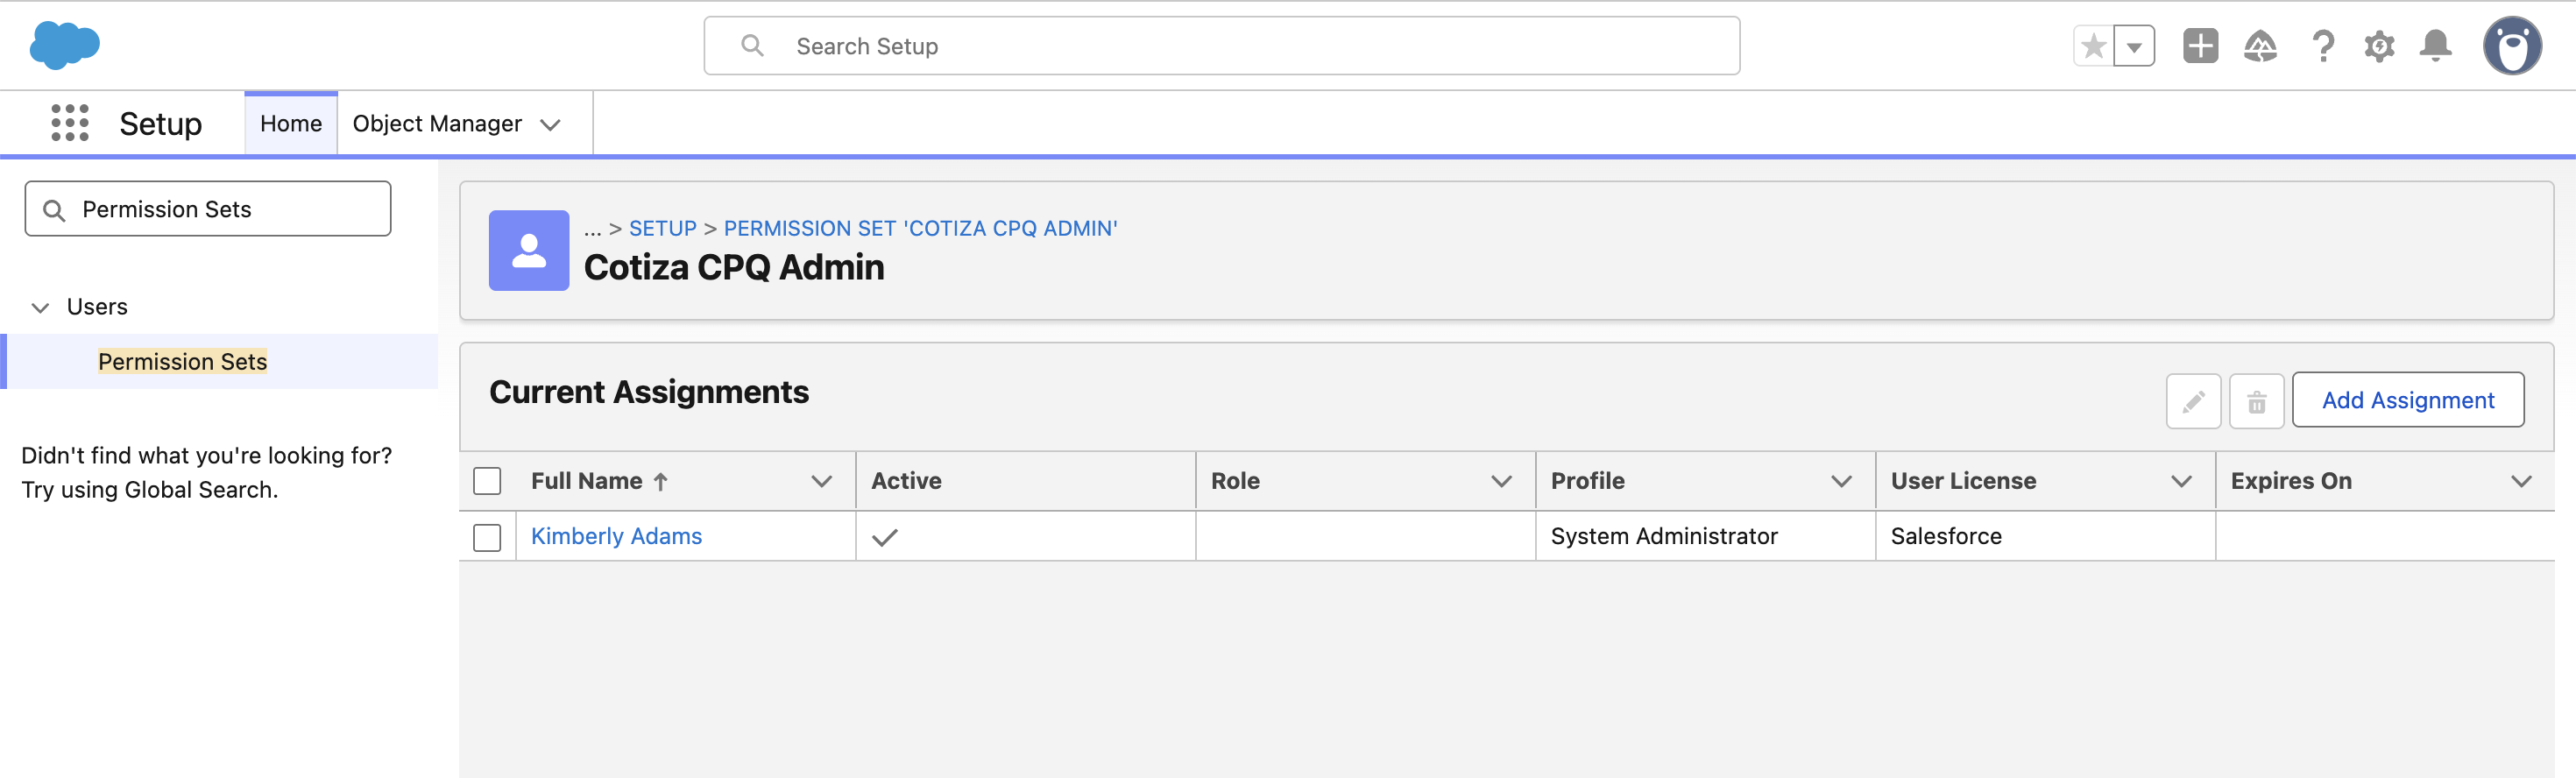
1. Assign admin permissions
Some CPQ configurations may require access to Salesforce Setup, but most can be accomplished using regular Salesforce data provided by CPQ. Before beginning configuration, ensure that whoever is assisting with CPQ setup has the Cotiza CPQ Admin permission set assigned.
See Permissions for details on permission sets.
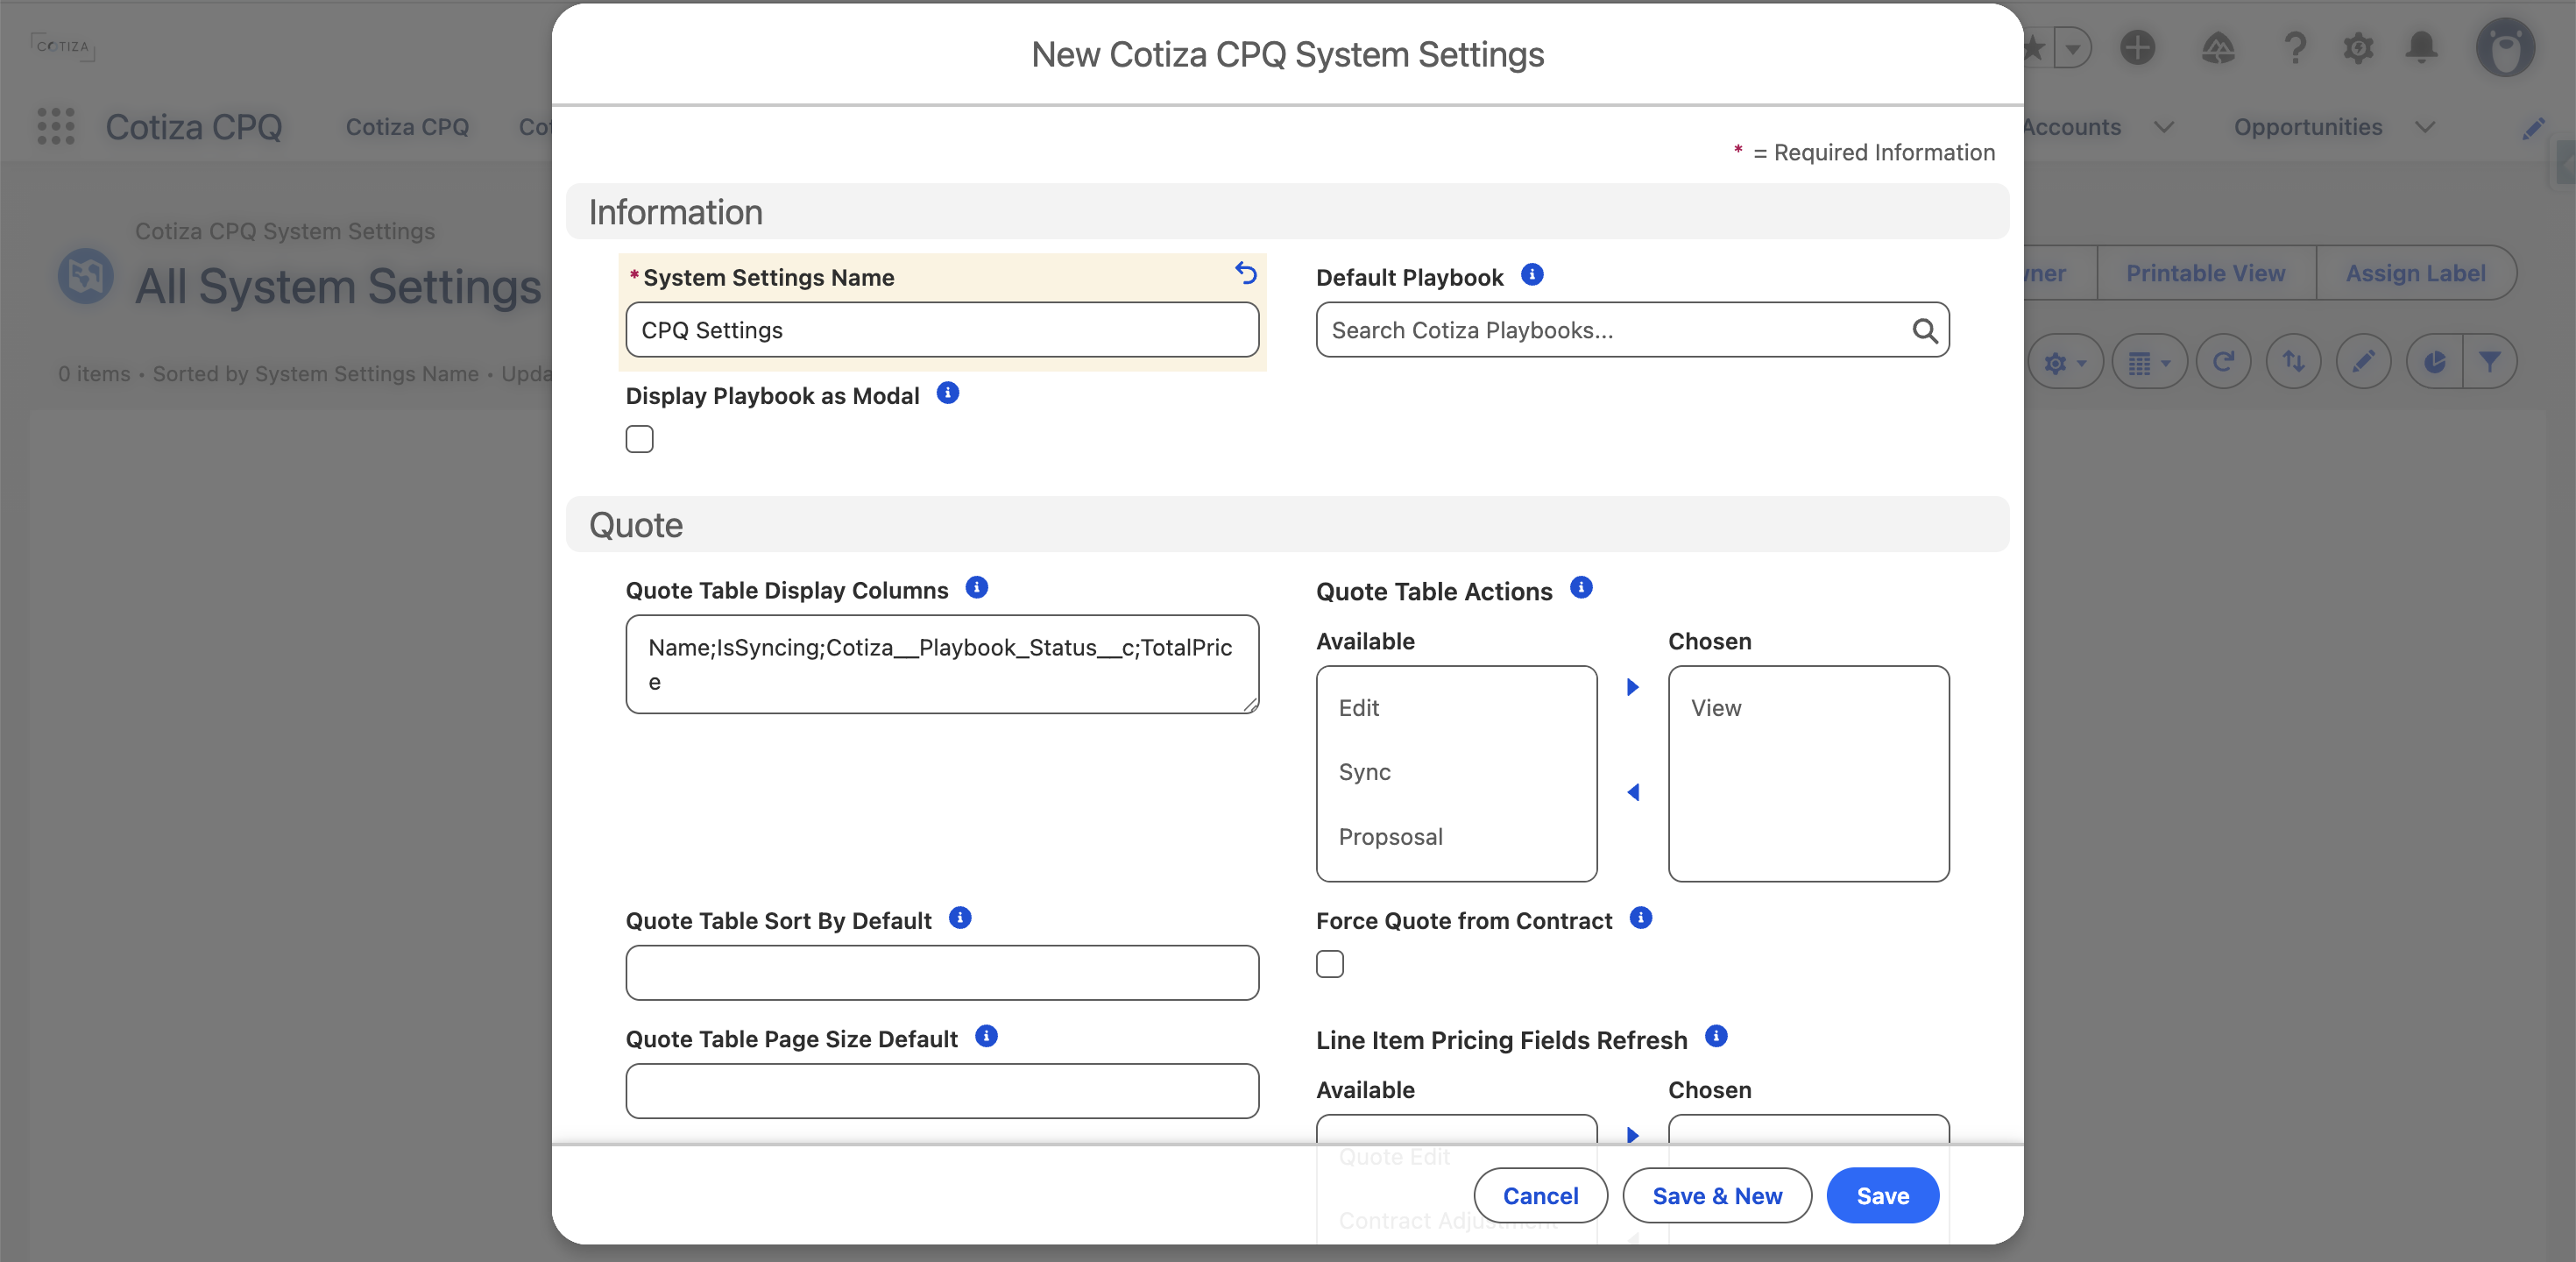
2. Create System Settings
- Open the App Launcher and search for Cotiza CPQ System Settings.
- Select New to create your System Settings record.
- Populate at minimum the Name field. You can update other fields later as you refine your configuration.
See CPQ System Settings for all available fields.
3. Configure price books
It is very likely that you will want to sell products in your business process. You may already have this defined in an existing Pricebook2 record, or you may decide to create new price book records for your CPQ implementation.
Whatever your scenario, take some time to ensure your products and price book entries are configured before building playbooks.
Permissions to modify Pricebook2, PricebookEntry, and Product2 objects must be handled in your org by your Salesforce admins. Cotiza permission sets provide additive access only.
See Price Book Entry for field reference.
If your pricing is more complex than price × quantity, you may not want to rely solely on the PricebookEntry UnitPrice field. Create Pricing Set and Pricing Threshold records to build more complex pricing structures.
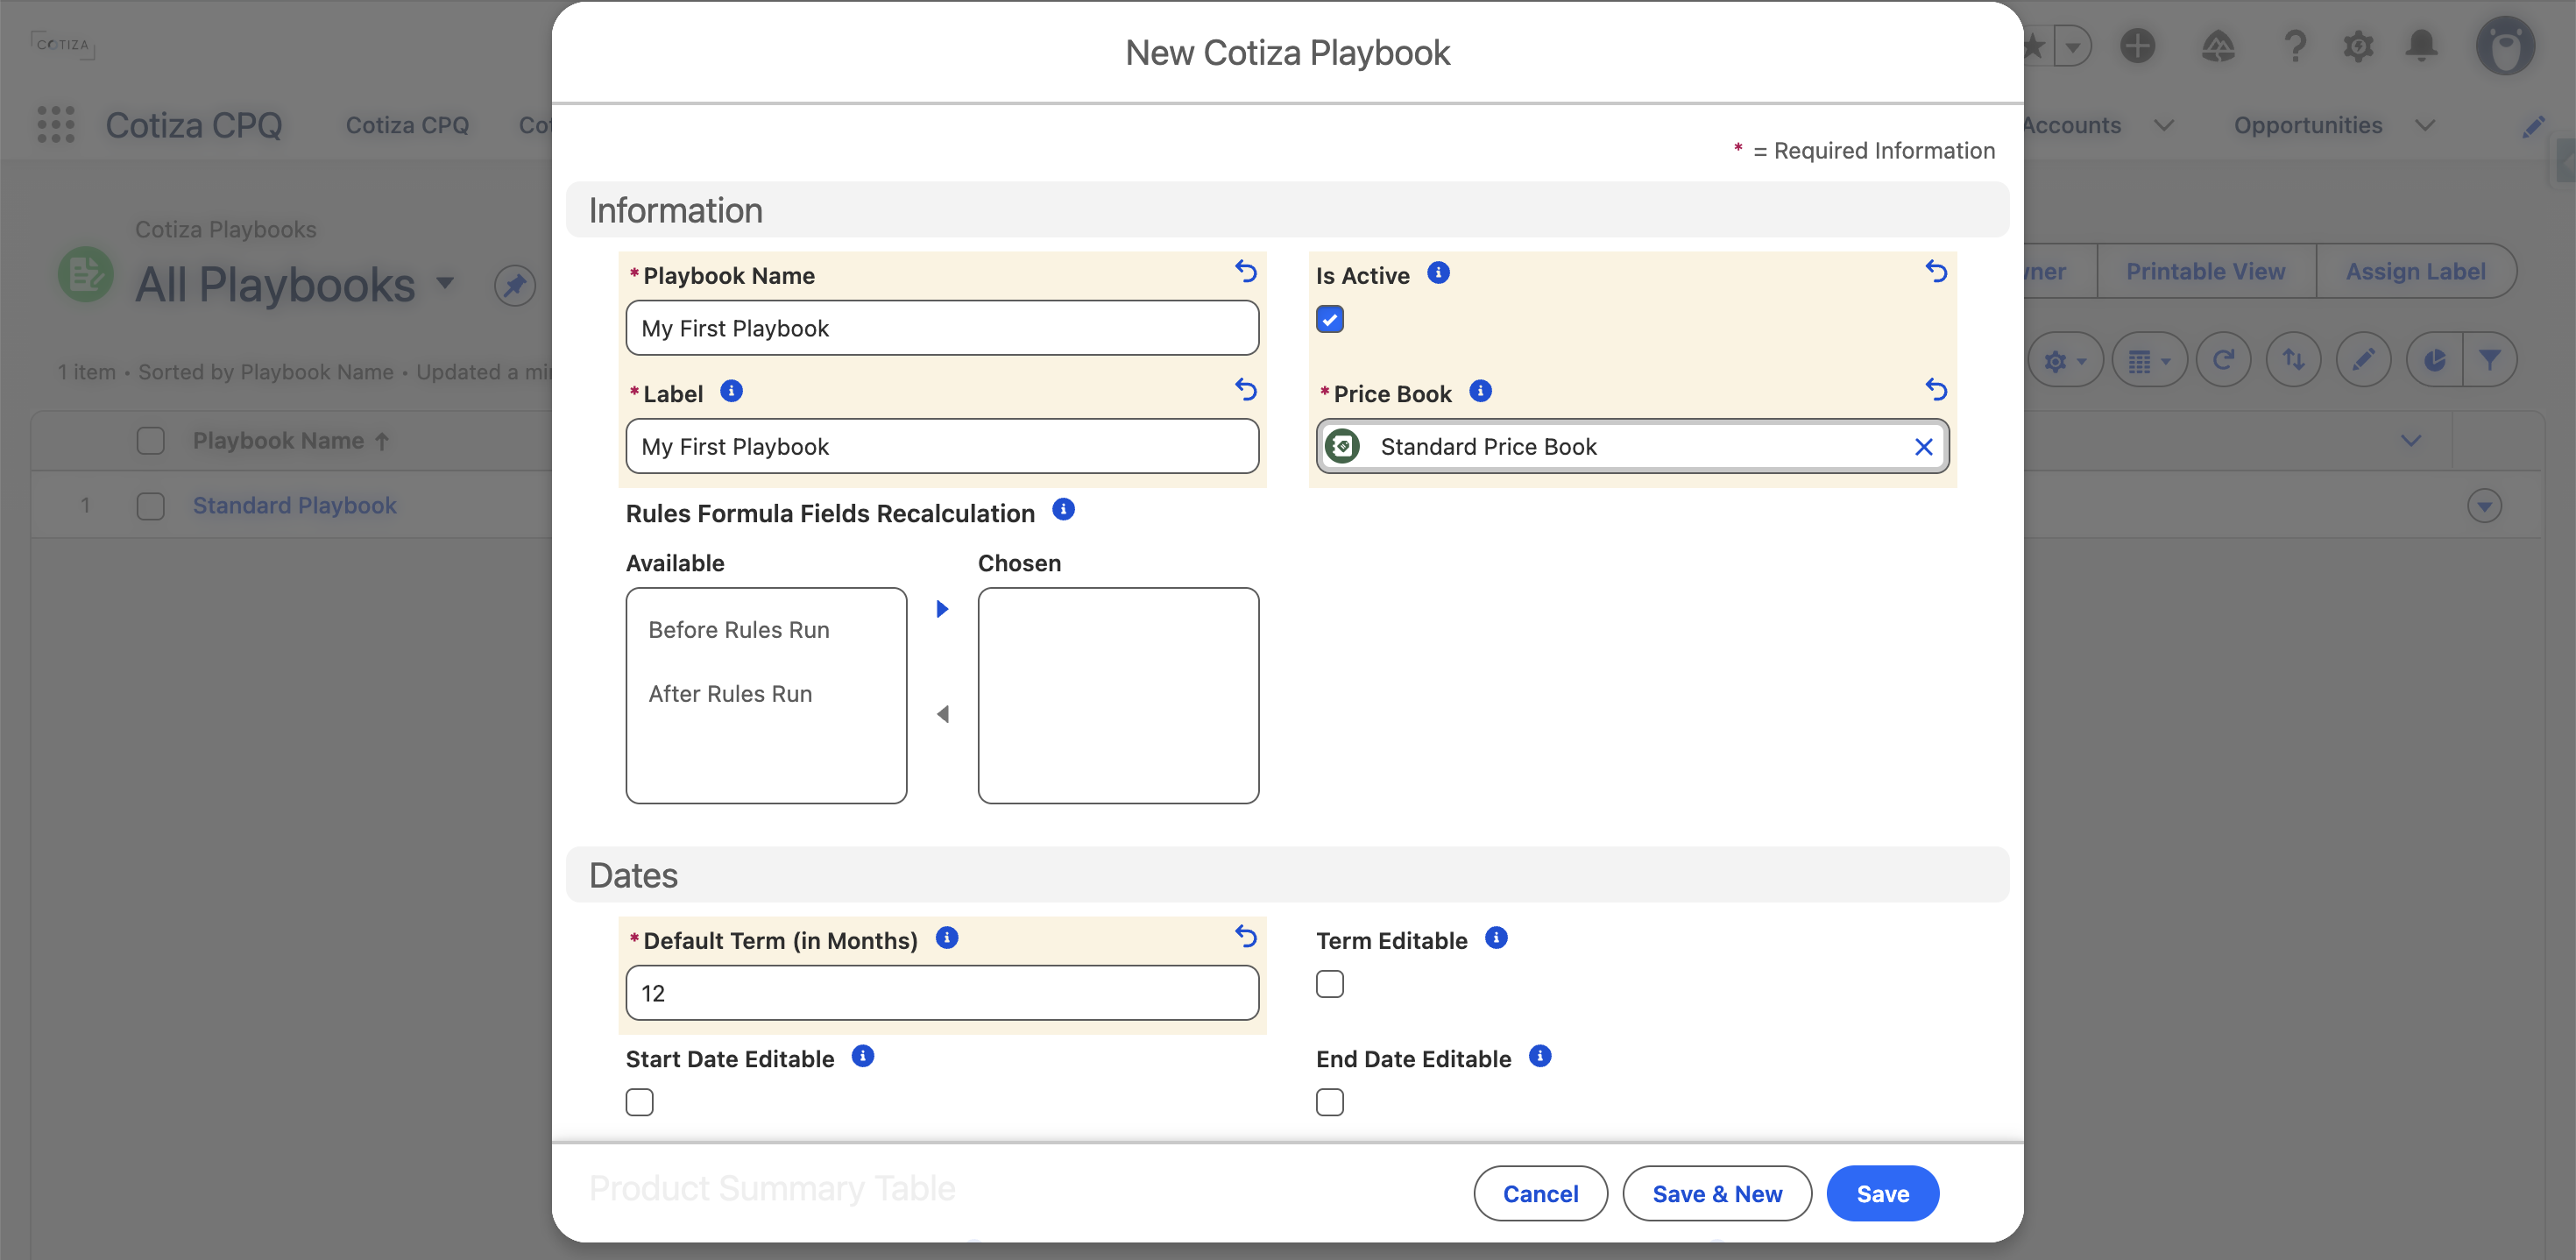
4. Configure a playbook
- Open the App Launcher and search for Cotiza Playbooks.
- Select New to create a new Playbook record.
- Populate the required fields. You can modify them at any time to adjust your operating motion.
See How Many Playbooks? for guidance on playbook design.
See Playbook for all available fields.
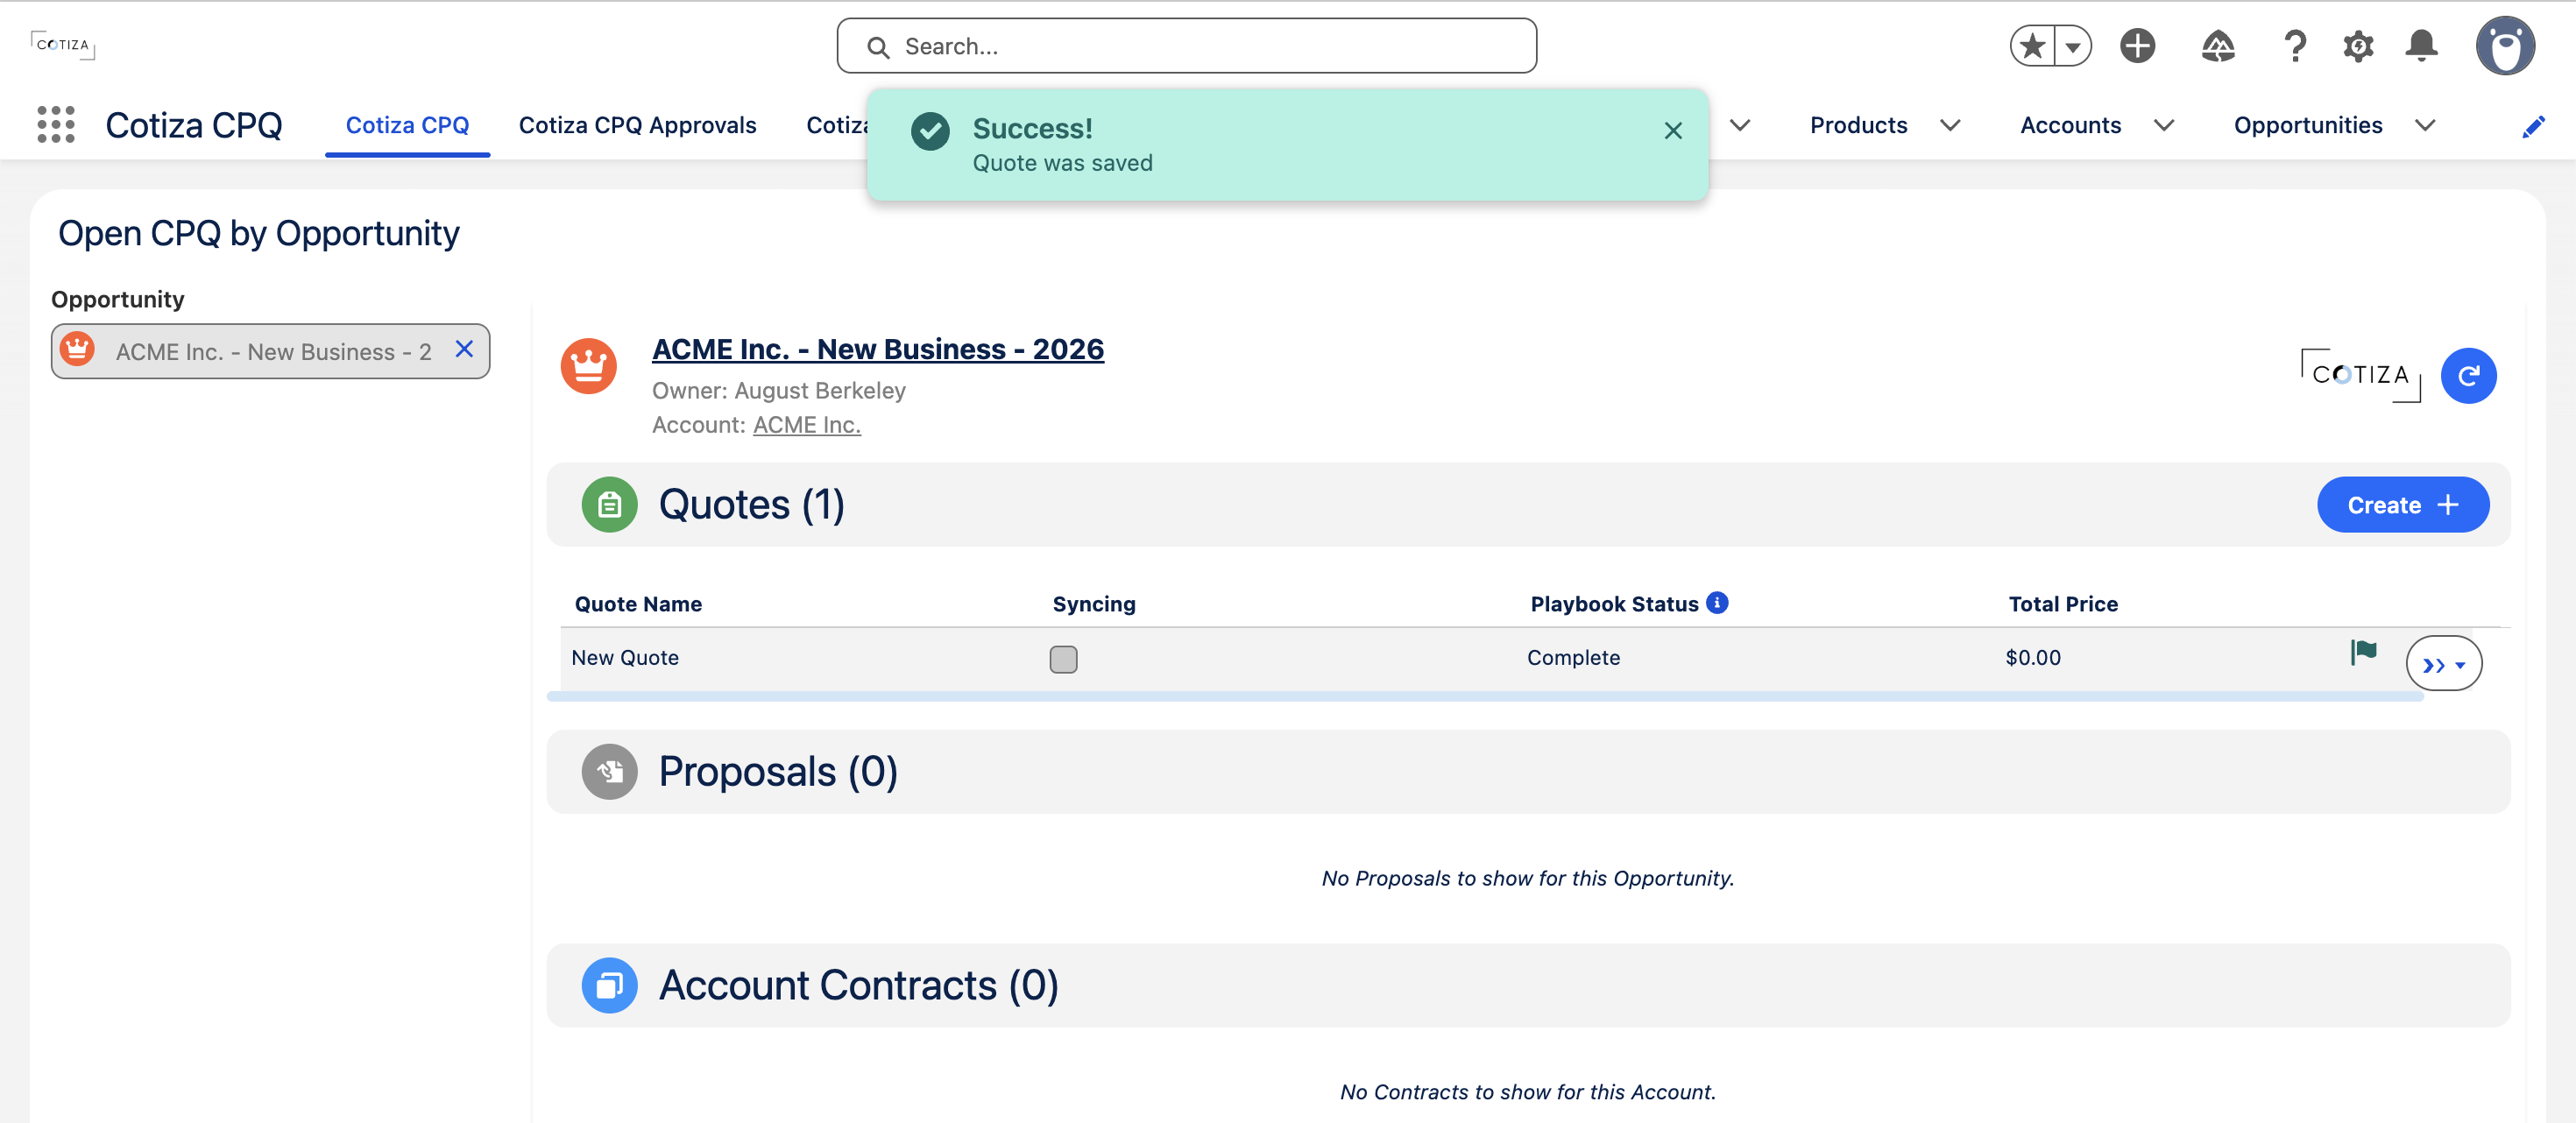
5. Create a quote
You now have everything you need to create a Quote.
- Ensure you have an Opportunity record.
- Open the App Launcher and search for Cotiza CPQ.
- Select the Opportunity where you would like to create a Quote.
- Click Create + in the Quotes table to start the Quote creation process.
- Click Save.
Next steps
After creating your first Quote, continue customizing your implementation:
- Configuration — admin object overview
- Configure Playbook Questions and Playbook Rules
- How Many Playbooks? — playbook design guidance
- Rule Evaluation — automation timing and order
- Approvals — approval workflow setup
- UI Components — tabs and Lightning components
- Update Pricebook2 records to expand product offerings